an experiment at gilt edging

MysticalMoose

They certainly look beautiful :)

I'm wondering if I have the patience to have a bash at this....

My Mythic is almost leaping out of it's bag in excitement at the thought of having Grecian Gold Edges!!!! :D

Lovely Job Davina :love:

MM
 

Taamar

What was your application method? One card at a time, rub edge with fingers? How did you keep from getting the stuff all over the card? I'm thinking of doing this to a homemade deck, yours looks so fantastic!
 

shadowdancer

what you see on my thumbnail is polish actually... but a few days old so looking straggly :)

I bought a square pad of foam, approx 4" square which is fairly rigid as it has a backing. I guess it is used by decorators too??

I squeezed a small amount onto the pad and then spread it across one side of the pad so it was evenly and thinly distributed.

Then tooka card and just pressed it oohh so lightly against this and ran it down. This meant I got minimal amount of the gilt onto the card faces, it was colouring only the edge. This was something I had to learn - how much pressure was needed to ensure I didn't get the gilt other than on the edge. It did happen to a few but before it was dry all I needed to do was run a finger nail over the card face and it took over the overspill so to speak.

I know it would be quicker to put them level in a vice and do them all in one go, so may try that with a deck for sure. This way I knew I could quality control each card though.
When I have got up will find the tube and write here what it is. Those of you from Aus and NZ will know Bunnings. That is where I got it.
The packaging said it came in 20 colours but they only had the ones mentioned and pewter.

Davina
 

Stormdancer

stormdancer339 said:
LOL And I thought that was her fingernail polish! :D

Stormdancer

Ha HA....I was right. I think it's cool that it matches your cards :D

Stormdancer
 

Myrrha

That is gorgeous! I like that fairy oracle quite a bit...
 

shadowdancer

right just found the tube... comes in 15ml sizes of a paste and is called
rub 'n buff.... comes in loads of colours including many shades of gold, silver, pewter, turquoise, reds etc. It's main use by looks of it is decorating picture frames. Loads on sale on e-bay.co.uk in the various colours and reasonably priced bearing in mind how many decks you will get out of one tube

will show the Mythic and Fantastic Menagerie when I finish them. The mythic was my first deck, is now 14 years old so all titles trimmed off. I know that deck backwards and in my sleep :)

Davina
 

shadowdancer

one more to see

here is the Osho Zen done with the same Grecian gold edging. (goes well with the reverse of the card)
Also shown are the sponge and tube I used to do the decks to date. Still have more than half a tube left after 5 decks, so you may get 9-10 decks from a 15ml tube :)

Sorry about the photo of the edge not being brill.. light is not good today so had a hard job showing it in its full glory. The real result is a lot richer and old gold looking than the photo - sort of half way between being copper and yellow gold we see on jewellery :)

Davina
 

Attachments

  • Img_6653.jpg
    Img_6653.jpg
    61.6 KB · Views: 544
  • Img_6658.jpg
    Img_6658.jpg
    50.3 KB · Views: 506

shadowdancer

last post on this I promise...lol

Have done 9 decks now, with still a fair bit of paste left. One tube does go a long way.

I have done the decks in two ways:

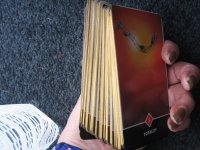
Those untrimmed it is easy to hold them tight together as one bundle with the edges flush and flat. Hold the deck upright at 90 degrees on a flat surface so you have the oppostite flat surface upwards for working on. If you have a vice or similar to hold them tight in place, even better. Then use the sponge with SMALL amount of the paste spread evently and thinly. (is worth having a spare piece of card either end of the stack cut to exact size, so if there is any over rub the cards are still protected - only this cut to size card takes the excess on the faces if that makes sense). This method takes literally no more than 10 minutes including checking each card individually in case there was a little over rub. If there is, I used a finger nail to just scrape it off before the whole thing dried set.

For trimmed cards I found it better to do them one at a time, as previously described. I am an incredibly careful trimmer but there is no way the whole deck was going to be exactly lined. It takes a lot longer but you are quality controlling as you go.

Great fun. Have some left in the tube and was wondering how the Drogi would look with gold/gilt edges also :) Drying time is quite quick - minutes. being a paste and not a liquid, there is no worry of the edges swelling if that makes sense.

Davina
 

Lain_82

Looks beautiful! I don't think I have the patience to do something like this, but you never know........ :)
 

AJ

thank you for your info and images.
I tried this a couple of years ago but my tube was old and it seemed to be mostly greasy. I'll get a new tube :)

On the trimmed decks, would it work if you tapped the deck on the surface then flipped it and put it in the vise or what ever? Same again on the other three sides?

thanks.